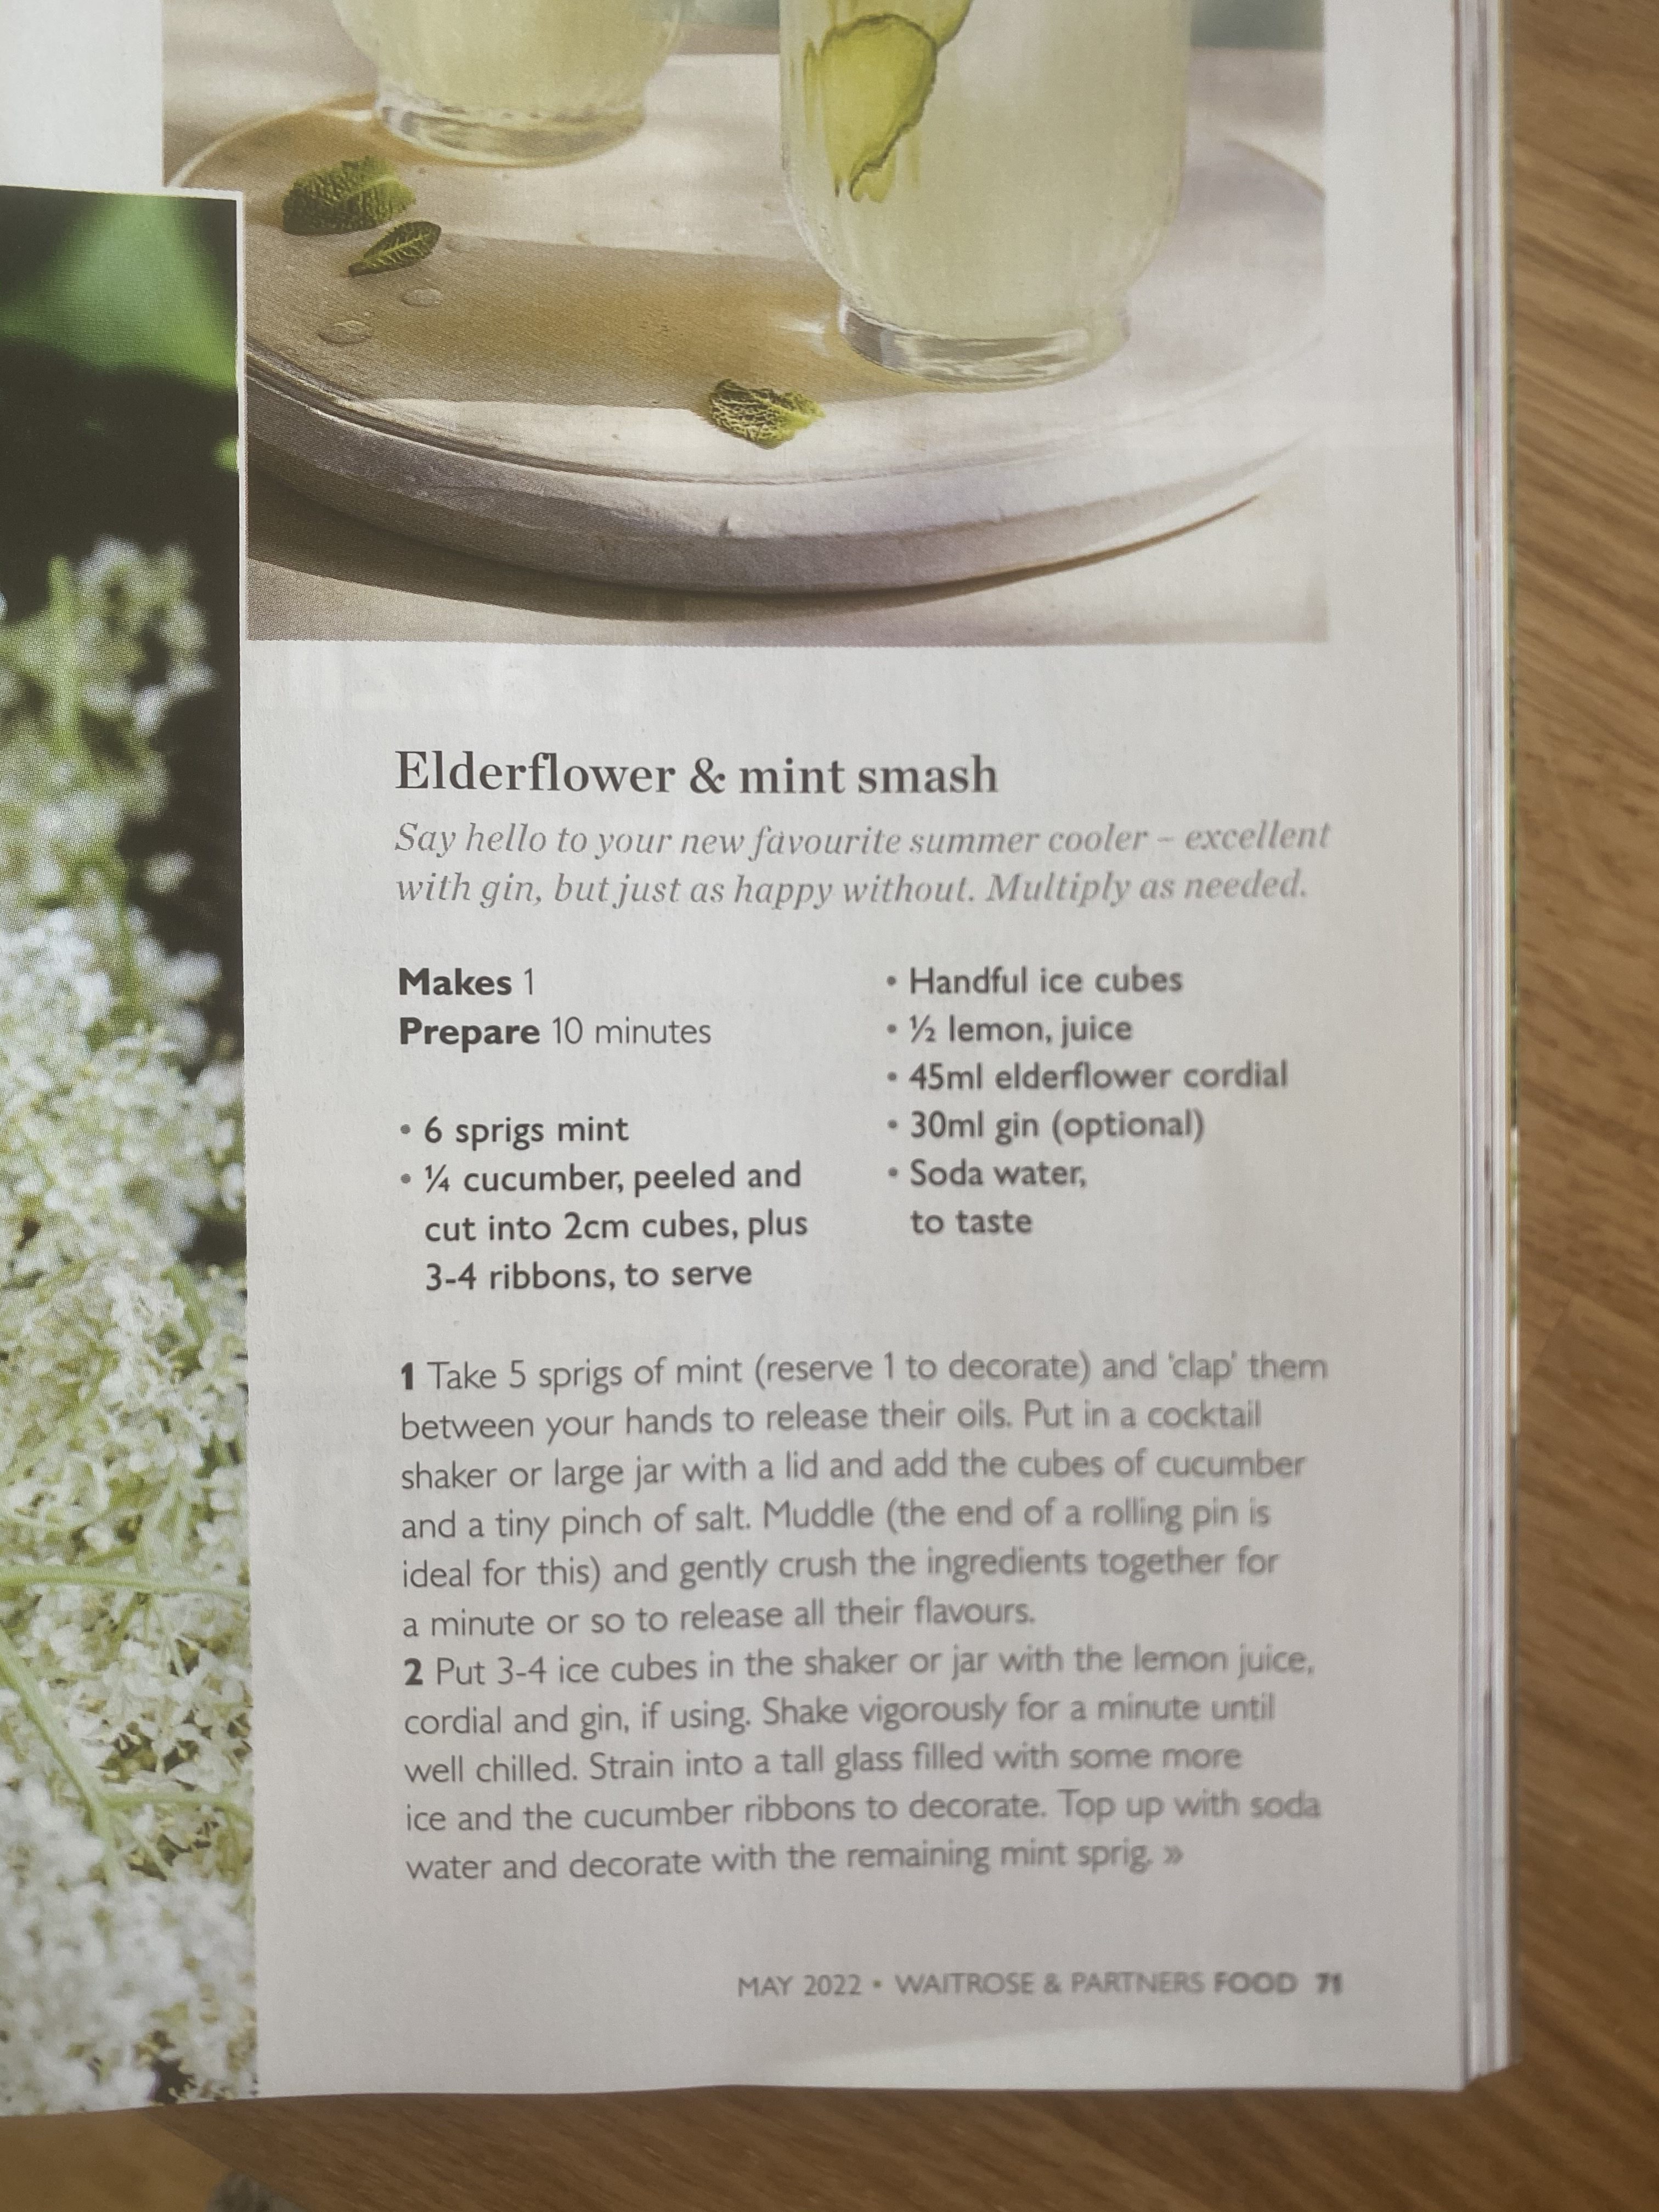
SERVES: 8Desserts can feel a bit wintry, but this berry pavlova is perfect for summer dining. Mounds of juicy fresh berries sitting on gently whipped cream and scattered with fresh mint leaves, all resting on a perfectly crisp and chewy meringue – it’s a real taste of hot, sunny days.Ingredients4 large egg whites225g caster sugar1 tsp white wine vinegar1 tsp cornflourFor the topping350ml double cream150g strawberries, halved or quartered150g raspberries150g redcurrants100g blueberriesTo finishFinely grated zest of 1 lemonFew sprigs of mintMethod1. Heat your oven to 130C (150C non-fan). Line a large baking tray with a sheet of baking paper. In a large, clean bowl, whisk the egg whites until they form stiff peaks. Gradually whisk in the caster sugar, a spoonful at a time, until it is all incorporated and you have a thick, glossy meringue. Fold in the wine vinegar and cornflour.2. Spread the meringue into a circle, about 23cm in diameter, on the lined baking tray. Bake for 1 hour, then switch off the oven and leave the pavlova inside to cool completely.3. Whip the cream in a bowl to soft peaks, then spread over the top of the meringue. Arrange the fruits on top, grate over a little zest and finish with a scattering of mint leaves.
https://apple.news/AnflHjPYFTuux-eNNn32sqw
0
comments

SERVES: 6-8If you have a sweet tooth, this is the dessert for you. Instead of a pastry base, which can go a bit soggy, I’ve used a crunchy walnut and biscuit crumb. It contrasts beautifully with the sweet and creamy caramel and banana filling.IngredientsFor the base175g digestive biscuits75g walnuts125g butter, meltedFor the caramel banana filling125g butter125g dark muscovado sugar400g tin dulce de leche (or other caramel)A pinch of sea salt4-5 ripe bananasFor the topping300ml double cream60g walnut pieces1 tbsp cocoa powderMethod1. To make the base, using a blender or food processor, blitz the biscuits and walnuts together to a crumb-like texture. Tip into a bowl and stir in the melted butter to coat the crumbs fully.2. Tip the crumb mixture into a 23cm loose-bottomed tart tin, 4cm deep, spread evenly and press down firmly onto the base. Place on a baking sheet.3. For the filling, in a heavy-based pan over a medium-low heat, melt the butter with the sugar until the sugar is dissolved. Add the dulce de leche with the salt and bring to the boil, stirring. Boil steadily for 5-6 minutes until large bubbles appear on the surface and the mixture thickens slightly to make a smooth caramel sauce. Leave to cool for 5 minutes.4. Roughly chop the bananas and stir them through the caramel sauce. Pour the mixture over the nutty biscuit base and spread out evenly. Place in the fridge to set for 30 minutes.5. When ready to serve, whip the cream to soft peaks and spread over the set caramel base. Scatter over the walnut pieces and dust with cocoa powder.
https://apple.news/AnflHjPYFTuux-eNNn32sqw
0
comments
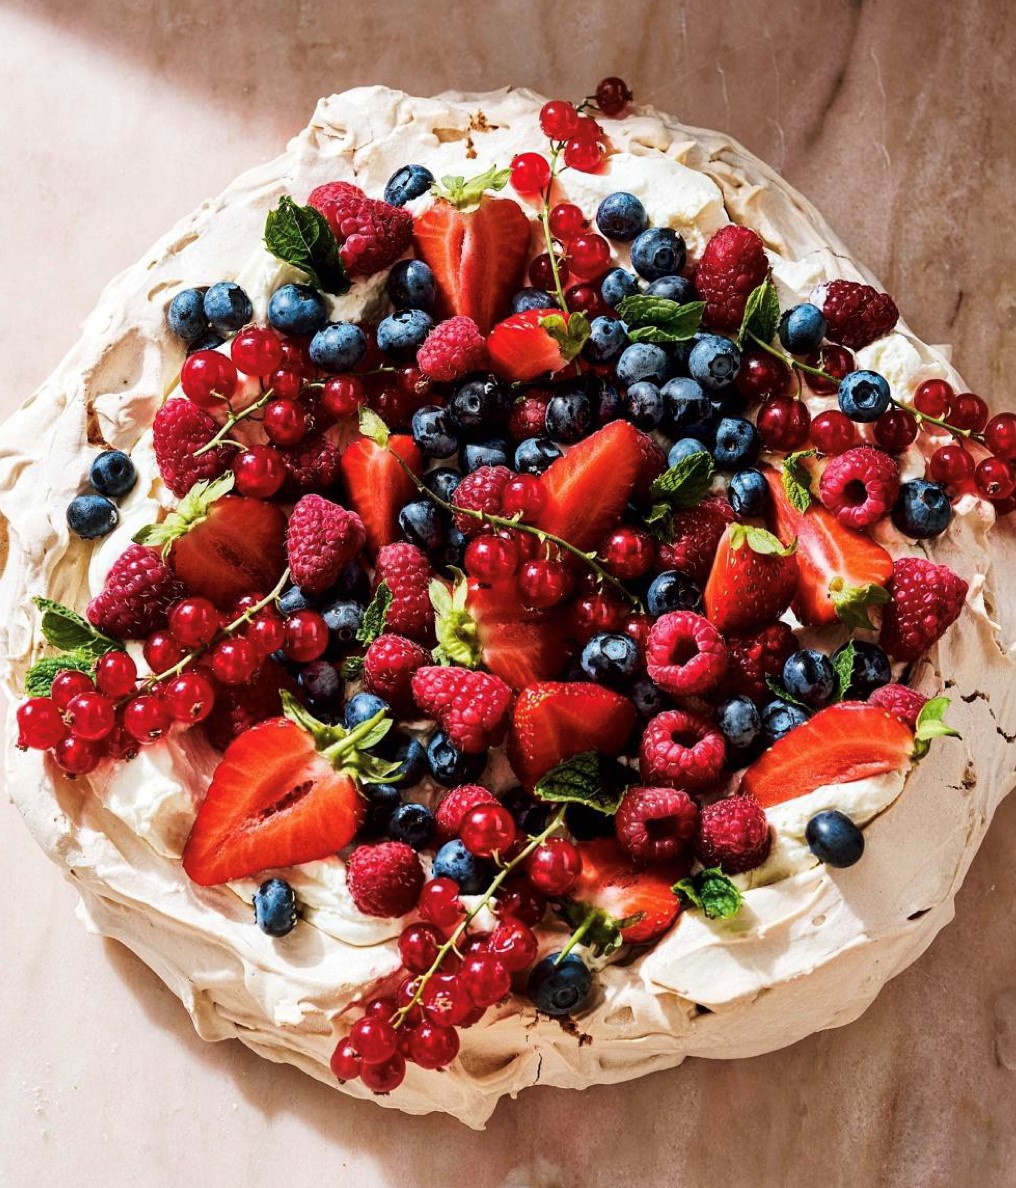
MAKES: 10 slicesIf you love chocolate cake, then you have to try this one. It is a real crowd-pleaser: not particularly rich but sweet, gooey and delicious. Using margarine rather than butter keeps it light, and the brown sugar adds colour and a hint of caramel. It makes a fantastic birthday cake too – just stick a candle in the middle and both kids and adults will want an extra slice once they’ve tried it.Ingredients175g soft margarine, plus extra to grease the tins225g soft light brown sugar200g caster sugar3 large eggs1 tsp vanilla extract250g plain flour125g cocoa powder1½ tsp baking powder½ tsp fine salt375ml soured creamFor the chocolate frosting150g dark chocolate, broken into small pieces100g cocoa powder225g unsalted butter, softened6 tbsp icing sugarMethod1. Heat your oven to 160C (180C non-fan). Grease three 20cm loose-bottomed sandwich tins and line the bases with baking paper. Using a stand mixer fitted with the whisk attachment, beat the margarine and sugars together until the mixture is pale and fluffy; this will take around 5 minutes. Scrape down the sides of the bowl with a spatula and whisk again.2. In a separate bowl, beat the eggs with the vanilla extract. With the mixer still running on a low-medium speed, slowly pour the beaten eggs into the mixture.3. Sift the flour with the cocoa powder, baking powder and salt. Add a large spoonful to the whisked mixture and stir in, then mix in a large spoonful of the soured cream. Repeat until all the flour and soured cream are incorporated. Beat until you have a smooth batter.4. Divide the batter equally between the prepared tins. Bake for 20-25 minutes until the cakes are risen and slightly shrunk away from the sides of the tin. Leave to cool in the tins before transferring to a wire rack to cool completely.5. To make the chocolate frosting, melt the chocolate in a heatproof bowl set over a pan of simmering water, making sure the base of the bowl is not in contact with the water. Stir until smooth and set aside to cool. In another bowl, mix the cocoa powder with 100ml boiling water to make a thick paste.6. In a large bowl, beat the butter until soft and fluffy, then add the icing sugar and whisk until pale and fluffy. Add the melted chocolate and cocoa paste and beat until the frosting is smooth.7. To assemble the cake, place one cake layer on your serving plate and spread with a quarter of the frosting. Place a second cake layer on top and spread with another quarter of the frosting. Position the final cake layer on top and cover the top and sides with the remaining frosting. Leave the frosting to set before cutting the cake.
https://apple.news/AnflHjPYFTuux-eNNn32sqw
0
comments

MAKES: 8-10 slicesTangy orange zest and chunks of dark chocolate folded into the mix give everyone’s favourite banana bread an upgrade. It has a delicious richness and wonderful intensity of flavour, yet it’s not overly sweet.Ingredients4 ripe bananas250g golden caster sugar125g unsalted butter, softened, plus extra to grease the tinFinely grated zest of 1 orange2 medium eggs250g plain flour2 tsp baking powder75g dark chocolate chunksMethod1. Heat your oven to 160C (180C non-fan). Grease and line a 1kg loaf tin with baking paper.2. Roughly chop 3 bananas and place them in a large bowl with the sugar, butter and orange zest. Whisk using an electric hand whisk until smoothly combined. Add the eggs, one at a time, beating well after each addition.3. Mix the flour and baking powder together, then sift over the banana mixture and gently fold in until evenly combined. Fold in the chocolate chunks.4. Spoon the mixture into the prepared loaf tin and gently smooth the surface to level it. Cut the remaining banana in half lengthways and gently press, cut side up, onto the surface of the mixture.5. Bake for 50-60 minutes until risen and golden brown. To check the banana bread is cooked, insert a skewer into the centre; it should come out clean.6. Remove from the tin and place on a wire rack to cool.
https://apple.news/AnflHjPYFTuux-eNNn32sqw
0
comments
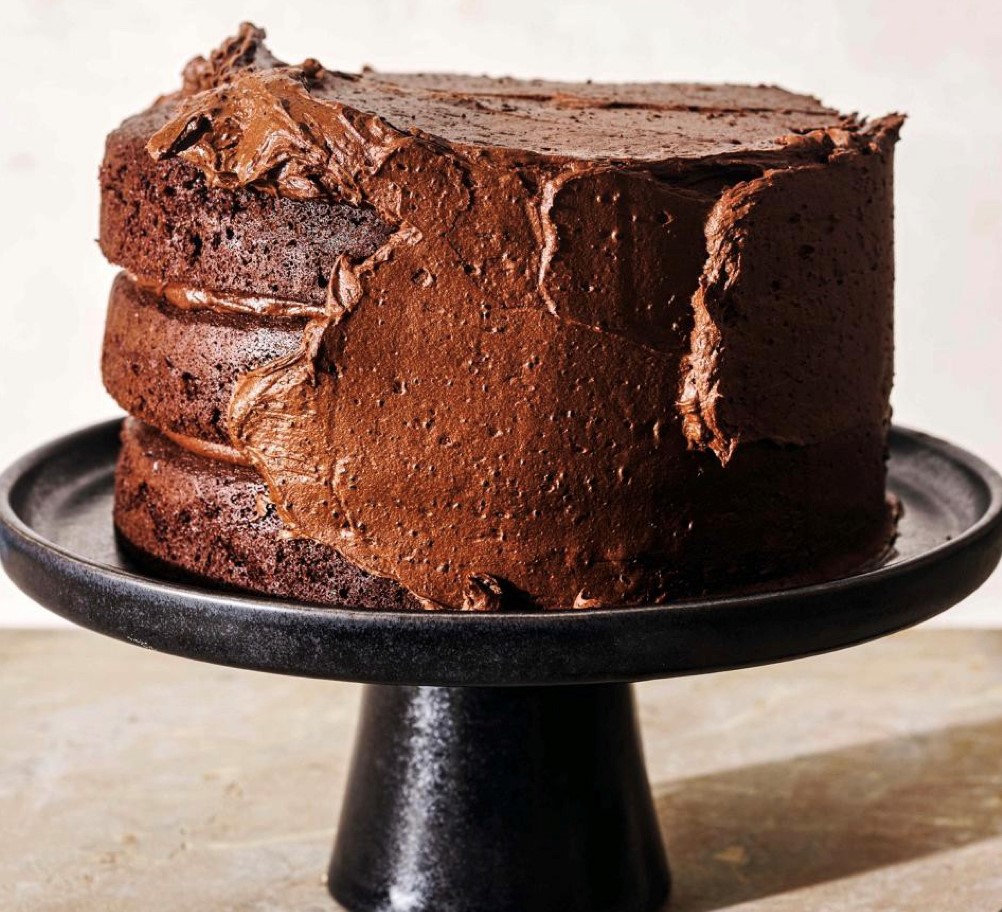
SERVES: 4Traditional bread and butter pudding is a thing of joy. It’s an old-fashioned recipe, so I’ve given it a modern update by adding white chocolate and fresh raspberries. Don’t be afraid to leave it in the oven for a few minutes longer so it takes on a bit of dark colour, as that’s where the flavour comes in.Ingredients75g butter, plus extra to grease the dish8 slices white bread, crusts removed125g raspberries100g white chocolate chips225ml whole milk225ml double cream1 vanilla pod, split and seeds scraped out3 large eggs25g caster sugarTo finish3 tbsp apricot jam25g icing sugarMethod1. Heat your oven to 160C (180C non-fan). Grease a one litre baking dish.2. Butter the slices of bread. Cover the base of the baking dish with a layer of buttered bread. Scatter over half of the raspberries and half of the white chocolate chips.3. Layer the remaining bread slices on top and scatter over the remaining raspberries and chocolate chips.4. In a pan over a medium-low heat, heat the milk and cream together with the vanilla seeds. Beat the eggs and sugar together in a bowl, then pour on the hot creamy milk, stirring as you do so. Carefully pour the egg mix over the bread.5. Stand the baking dish in a deep roasting tray and pour enough cold water into the tray to come about 2.5cm up the side of the dish.6. Bake for 30 minutes or until the pudding is just set and golden.7. In a small pan, heat the apricot jam with a splash of water, then pass through a sieve. Set aside.8. Dust the pudding with icing sugar and wave a cook’s blowtorch over the surface to caramelise. Brush with the warm apricot glaze and serve, with clotted cream or ice cream if you like.
https://apple.news/AnflHjPYFTuux-eNNn32sqw
0
comments

MAKES: 10 slicesThis is a deceptively easy cake, made using ingredients you might already have in your kitchen cupboards. There are a few more stages involved, such as making a sugar syrup and melting the chocolate, but it isn’t difficult and the end result looks really impressive.Ingredients210g caster sugar300g dark chocolate, broken into small pieces150g unsalted butter, cut into pieces, plus extra to grease tin4 large eggs3 tbsp plain flour50g hazelnuts, toasted and roughly choppedFor the Amaretto cream250g double cream3 tbsp Amaretto liqueur2 tbsp icing sugar, sifted
To finishCocoa powderMethod1. Heat your oven to 170C (190C non-fan). Grease a 21cm cake tin and line the base with baking paper.2. In a saucepan, heat 130g sugar with 130ml water until dissolved to form a sugar syrup.3. Melt the chocolate and butter together in a heatproof bowl over a pan of simmering water, making sure the base of the bowl is not touching the water.4. Using a stand mixer fitted with the whisk attachment, beat the eggs and remaining 80g sugar until tripled in volume. Add the sugar syrup and melted chocolate mixture and whisk to combine.5. Sift the flour over the mixture and gently fold in, along with the chopped nuts.6. Spoon the mixture into the prepared tin and bake for 40-45 minutes until firm. Leave to cool completely before removing from the tin.7. For the Amaretto cream, whip the cream in a bowl until it forms soft peaks, then fold in the liqueur and icing sugar.8. Dust the surface of the cake with cocoa powder and serve each slice with a good dollop of the Amaretto cream on the side.
https://apple.news/AnflHjPYFTuux-eNNn32sqw
0
comments
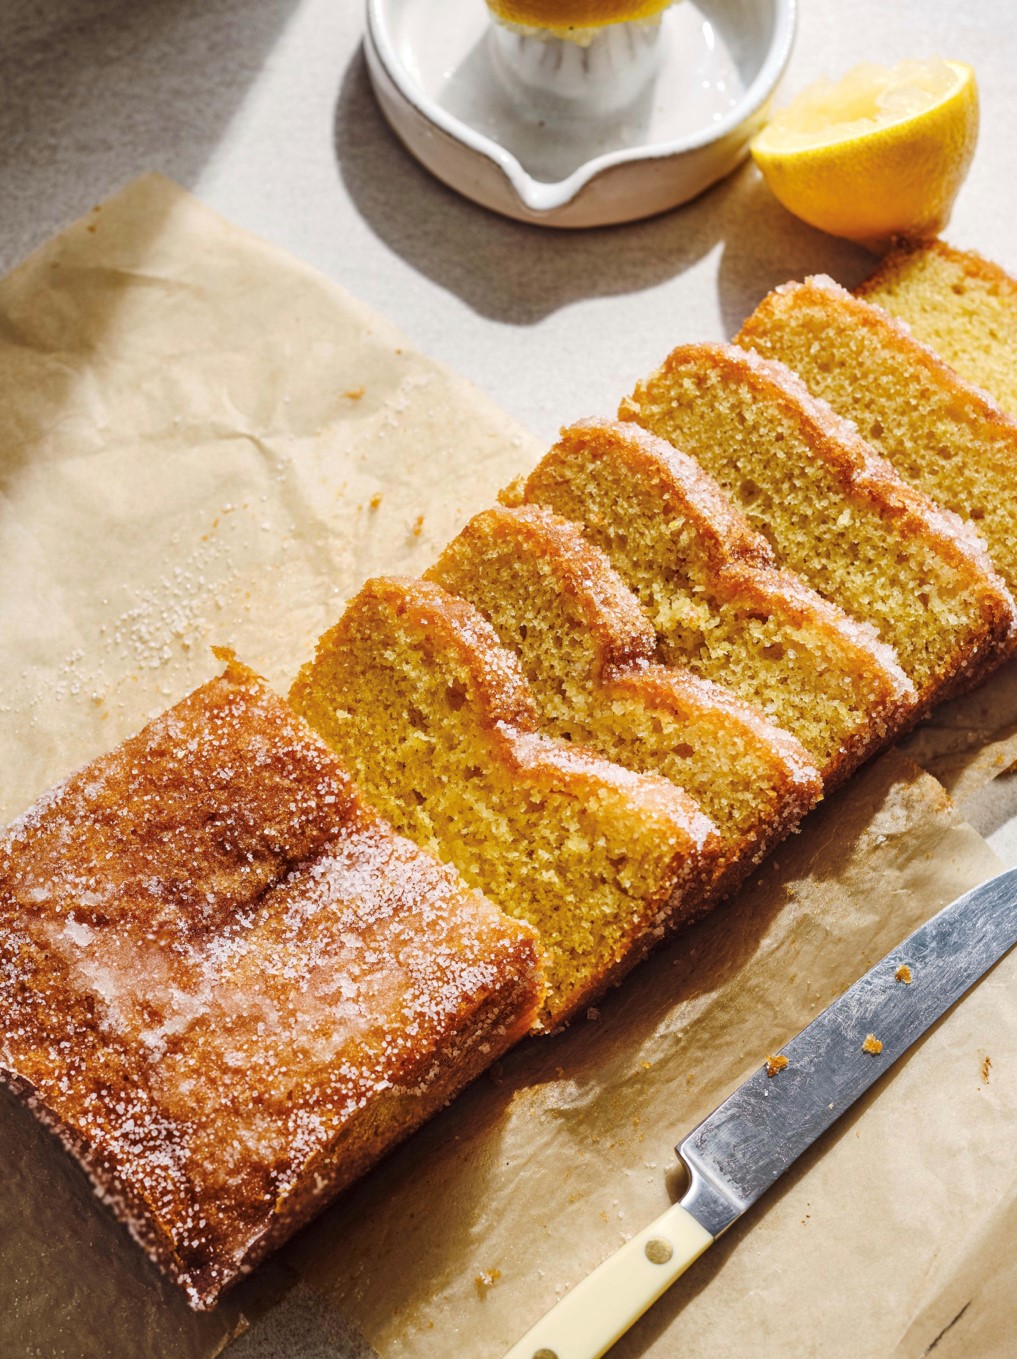
MAKES: 8-10 slicesThis is my favourite cake of all time. I love it when we have to judge this round on Bake Off. The perfect lemon drizzle has a light and airy sponge and a sharp, zesty crunchy topping. My version has quite an intense lemony flavour, but other than that it’s a total classic and I don’t think you should mess with those classics. The only thing to remember is to pour over the drizzle while the cake is still warm.Ingredients175g butter, softened, plus extra to grease the tin175g caster sugarFinely grated zest of 2 lemons3 medium eggs175g self-raising flour¼ tsp baking powderA pinch of fine saltAbout 2 tbsp milkFor the drizzle toppingJuice of 1 lemon2 tbsp granulated sugarMethod1. Heat your oven to 160C (180C non-fan). Grease and then line a 1kg loaf tin with baking paper.2. In a large bowl, beat the butter, sugar and lemon zest together, using a hand-held electric whisk, until the mixture is very light and fluffy.3. Add the eggs one at a time, beating well after each addition. Add the flour, baking powder and salt and mix until smoothly combined. Add just enough milk to achieve a dropping consistency.4. Spoon the mixture into the prepared loaf tin and gently smooth the surface to level it. Bake for 45-50 minutes or until a skewer inserted into the centre comes out clean.5. Once you’ve removed the cake from the oven, make the drizzle topping: mix the lemon juice and sugar together in a small jug.6. While the cake is still warm, use a cocktail stick to prick holes all over the top of the cake, then trickle over the lemon drizzle. Leave to cool completely in the tin before removing.
https://apple.news/AnflHjPYFTuux-eNNn32sqw
0
comments